


✅ Made from Finnish wood, responsibly produced
✅ Completely natural and safe product
✅ Light and fresh appearance
✅ Handles moisture fluctuations well
✅ PEFC-certified
| Length | Available | |
|---|---|---|
| 2.38 m | 447.44 m |
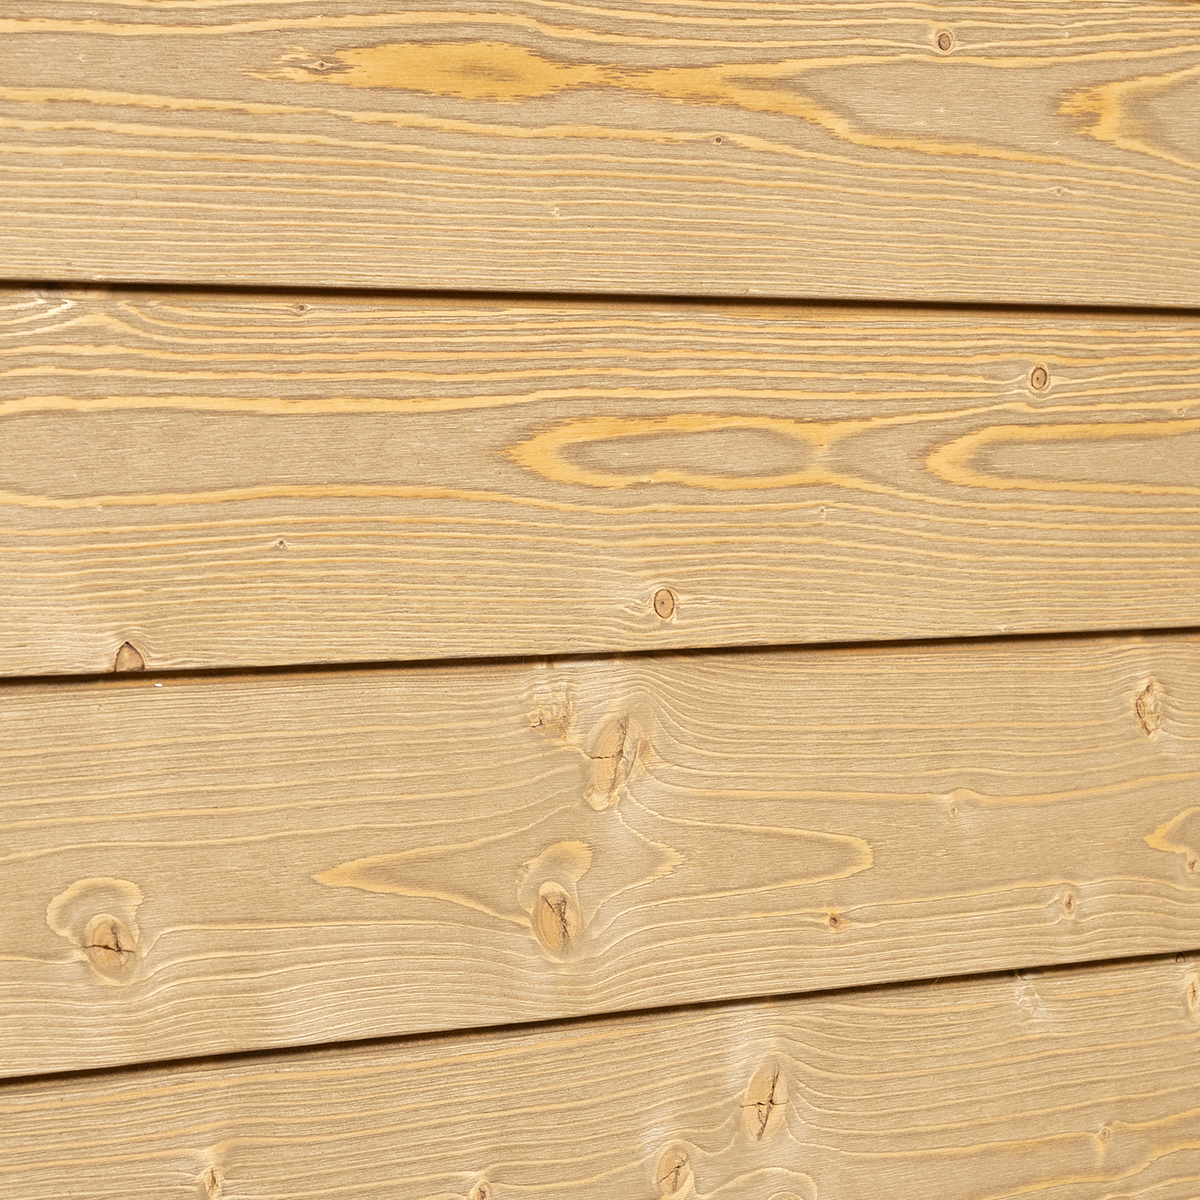
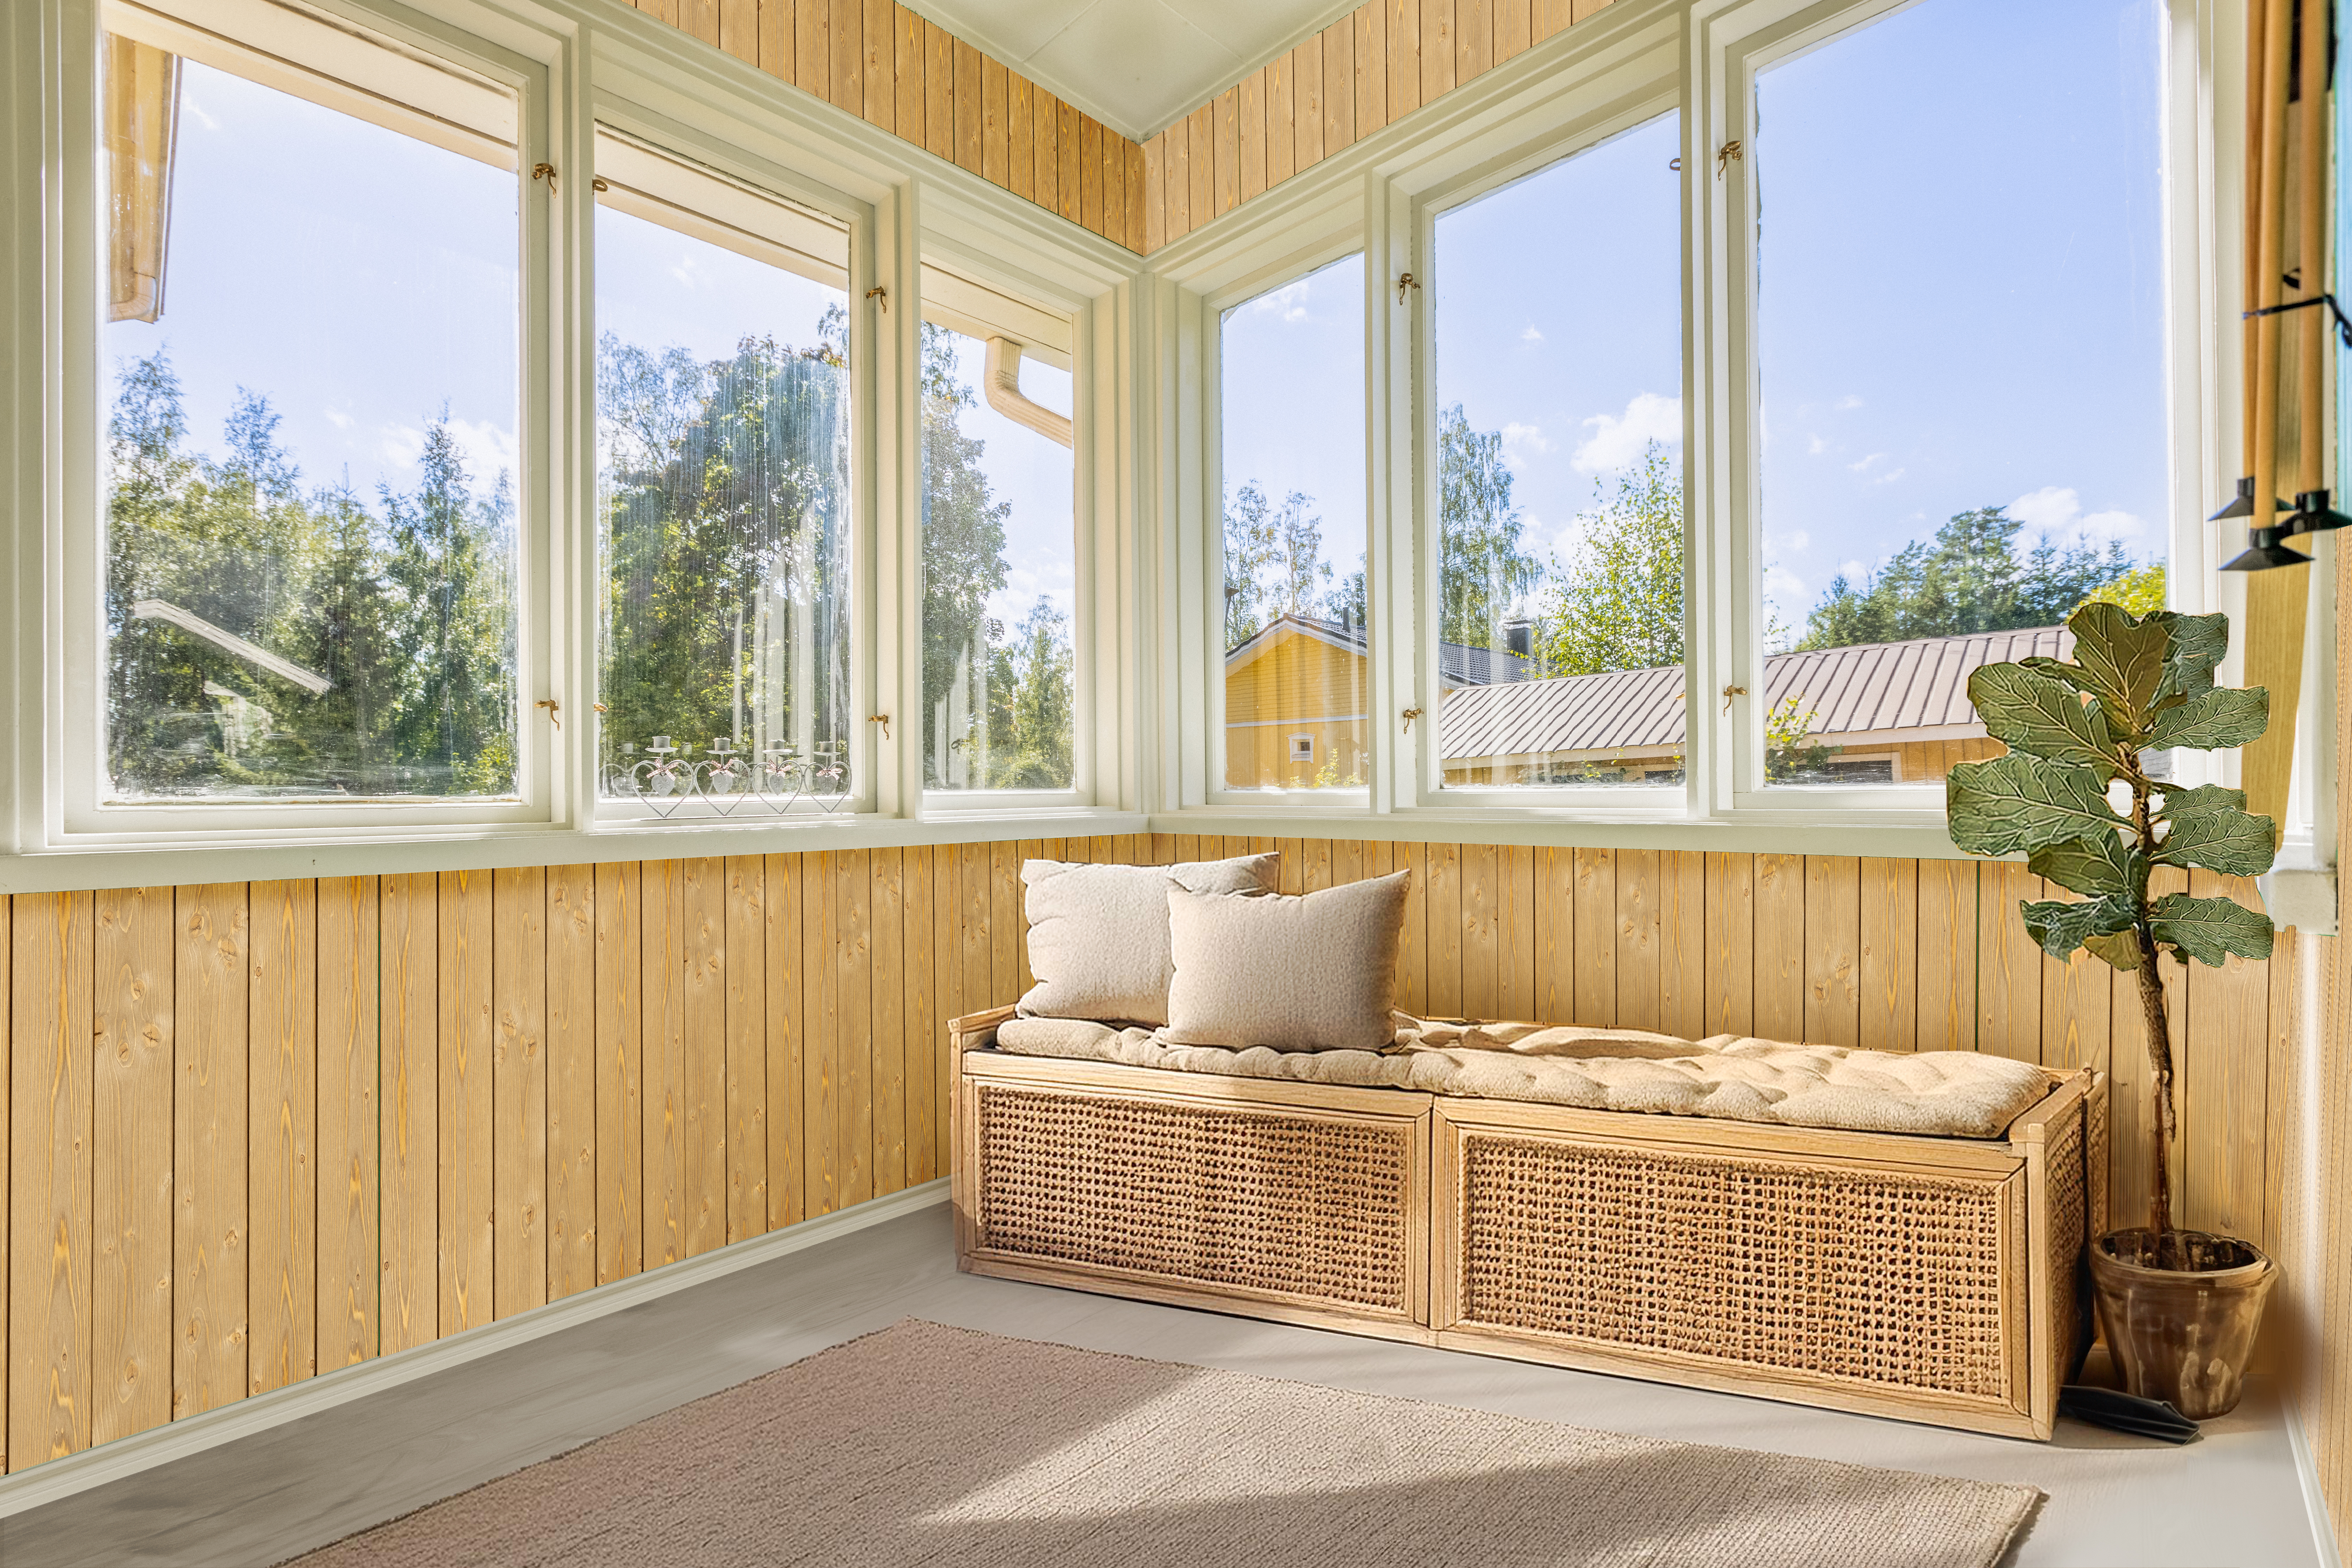
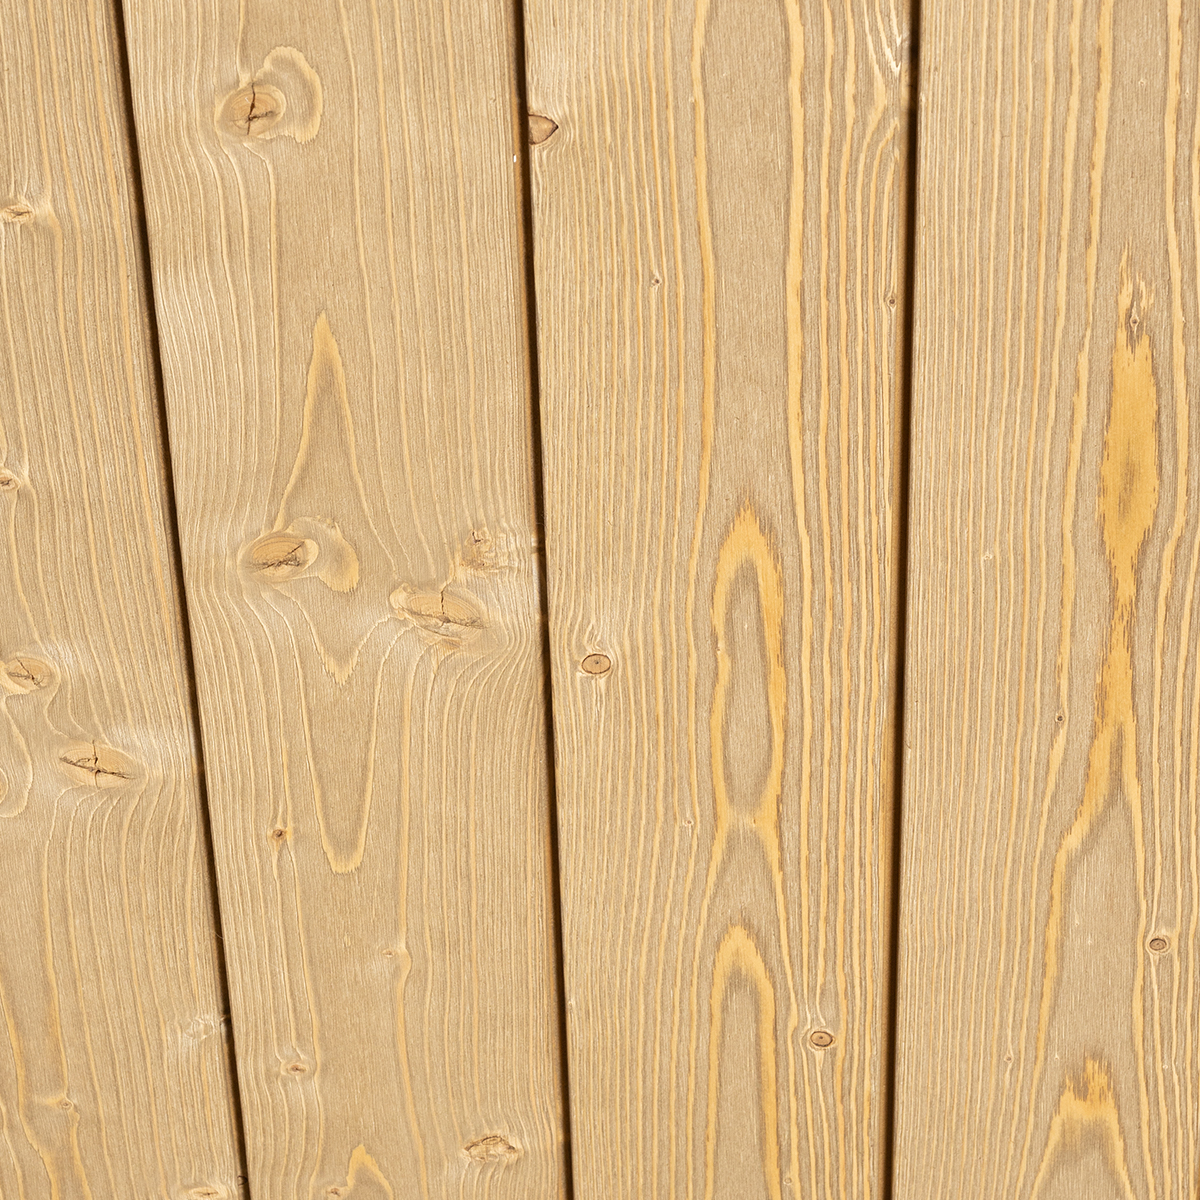
Made from domestic, healthy-knot spruce. The panel surface is heavily brushed (structured) and semi-transparent stained, highlighting the wood grain prominently.
The panels are suitable for saunas and dry indoor spaces.
For treating cut surfaces, we recommend a translucent sauna protection finish in shade 231A.
✅ Finnish wood, responsibly manufactured in Lempäälä
✅ Completely natural and safe product
✅ Light and fresh appearance
✅ Excellent resistance to moisture fluctuations
✅ PEFC-certified
Our product uses spruce, a domestic, versatile, and strong softwood that handles moisture changes well. Easy to work with and finish, spruce is ideal for interior use, saunas, and, when treated, exterior cladding. Its warm light color and straight-grained pattern make spruce an aesthetically pleasing choice for visible surfaces. Our PEFC-certified spruce products are responsibly produced and environmentally friendly.
Product information
| Tuotenimi | KUUSIPANEELI 15x120 STS4 TK SAUNAS KARKEA HIEKKA |
| Tuotenumero | 4324 |
| Alkuperämaa | Suomi |
| Toimitusaika | 4 päivää, kun tuotetta varastossa |
| Saatavuus | Tuote poistuu valikoimasta |
Product measurements
| Vahvuus (mm) | 15 |
| Leveys (mm) | 120 |
| Paino (kg/myyntiyksikkö) | 0,846 |
| Neliömenekki (m/m²) | 9,1 |
| Hyötyleveys (mm) | 110 |
Product features
| Puulaji | Kuusi |
| Pintakäsittely | Värillinen saunasuojaus |
| Päätyponttaus | Ei |
| Piilokiinnityspontti | Ei |
| Palokäyttäytyminen | D-s2, d0 |
Sustainability
| CE-merkintä | Ei |
Grading rules
You can download the grading rules applied in the manufacture of this product here: Spruce
Minimum order size
Please note that we deliver our products in bundles. Bundle size is indicated together with stock information on top right corner.
Surface treatment brings out the best in wood
The right surface treatment finishes the wood for exactly the purpose it's meant for. It protects the wood, extends its life cycle and gives it a color that suits the look of your home or building.
Not all wood needs treatment, but surface treatment lets you highlight different qualities of the wood. When the wood is treated during manufacturing, it's ready to install right away. This makes tight construction and renovation schedules easier to manage.
Why choose industrial surface treatment?
We paint and treat the wood on our own industrial paintline right after planing. At that point, the wood surface is open and the paint or treatment soaks in effectively. The temperature and humidity on our paintline stay constant, so the paint spreads evenly and dries properly. The result lasts longer than paint applied on site at the mercy of the weather.
- You save time. Industrially treated wood is ready to install, so there's no need to wait for good painting weather on site.
- You get an even finish. In controlled conditions, every board and panel receives the same treatment.
- The wood is protected during construction. The surface treatment protects the wood from rain and sunlight from the moment it's installed.
Surface treatment options
The right surface treatment depends on how the wood will be used and the look you're after.
- Opaque paint covers the grain of the wood and gives the surface an even, finished color. Outdoors, opaque paint protects the wood for a long time.
- Semi-transparent treatment gives the wood a color tone while letting its natural grain show through.
- Sauna protection treatment helps wooden sauna surfaces withstand high temperatures and humidity. It also makes the surface easier to keep clean.
- Fire-retardant treatment gives the wood surface a fire classification of B-s1, d0. This is the highest class available for wood construction products, so fire-retardant wood can also be used in buildings with strict fire safety requirements.
Good to know about wood species
Wood species differ from one another, and the need for treatment depends on both the species and how the wood is used.
- Spruce always needs a protective surface treatment outdoors. Spruce cladding is painted with either semi-transparent or opaque paint.
- Douglas fir and larch are naturally rot-resistant and dense, so they don't need surface treatment outdoors. Left untreated, they turn a beautiful silvery gray over time.
- Thermally modified wood has excellent dimensional stability thanks to thermal modification.
- For wood used in saunas, we recommend sauna protection treatment regardless of the species.
Responsibly treated
We use water-based paints and treatments from well-known manufacturers. Water-based products contain fewer solvents than solvent-based ones, so they put less strain on the environment and indoor air.
DID YOU KNOW? Because we want to operate as sustainably as possible, each batch we treat must be at least 500 meters. This way, we don't waste raw materials, and our operations stay efficient.
Ask us more
We have long experience in wood surface treatment, and we're happy to help you find the right treatment for your project. Contact our sales team to learn more about the options.
Installing sauna panels
Sauna panels create the atmosphere of your sauna. Your choice of wood species and surface treatment shapes the color of the sauna and how well the panels withstand its heat and humidity.
The color of the wood changes over time due to UV light, moisture and changes in temperature. Dark thermally modified wood becomes lighter, and light wood becomes darker.
Choose your wood species
Spruce, aspen and alder
Light wood species are an excellent choice for saunas. Aspen, for example, is resin-free and conducts heat slowly, so the surface doesn't get too hot.
Treat these species with sauna protection treatment or paraffin oil. The treatment protects the panels from moisture and dirt and makes them easier to clean. Sauna protection treatment also lets you add a color tone to the panels. You can also order the panels with factory-applied sauna protection treatment, so they're ready to install right away.
Thermally modified wood species
Thermal modification gives the wood excellent dimensional stability and a beautiful dark color. For thermally modified panels, we recommend paraffin oil treatment only.
Why isn't pine suitable for saunas?
Untreated pine is not a good choice for saunas. When the surface heats up, resin seeps out of pine. Thermally modified pine works well in saunas, as thermal modification removes the resin from the wood.
Storage and acclimatization
- Let the panels acclimatize. Bring the panels into the sauna 1–2 weeks before installation. The room temperature should be about +20 °C and the relative humidity 40–60%.
- Store the panels correctly. Store the panels horizontally in their unopened small packs, at least 30 mm off the ground. Open the packs just before installation.
- Keep conditions stable. During storage, the humidity must not rise above the normal level for the room where the panels will be used, and the temperature must be higher than outdoors.
Good to know: Wet work, such as leveling and tiling, raises the humidity in a room significantly. Panels stored in the same room will swell. A construction heater, on the other hand, dries the air and makes the wood shrink, and a rapid drop in humidity can cause the wood to crack. If the packs have been stored in a tight bundle, the packs in the middle and on the outside of the bundle may have different moisture levels. That's why it's a good idea to break up the bundle and let the small packs acclimatize unopened.
Before installation
- Allow for waste. Order about 10% more panels than the calculated quantity.
- Allow extra length for cutting. The stated product length is not an exact measurement, so choose panels that are at least 5 cm longer than you need.
- Plan the direction and joints. Decide in advance whether to install the panels horizontally or vertically, and where any joints will go.
- Sort the panels. Sort the panels by color or knots so that you can spread them evenly across the whole surface.
Battens
The panels are installed on battens. The direction of the battens depends on the direction of the panels:
- Horizontal paneling: install the battens vertically.
- Vertical paneling: install the battens horizontally.
Make sure the battens are straight. Choose the batten spacing to suit the project, but no more than 600 mm.
Ensure ventilation. A ventilation gap is needed between the panels and the vapor barrier. Leave a small gap at the bottom of the wall, and leave out trim where the wall meets the ceiling, so that air can circulate behind the panels.
Install the panels
- Leave room for movement. Wood moves with changes in moisture, so leave a gap of about 15 mm between the panel and the adjoining wall.
- Install horizontal panels with the tongue facing up. This keeps moisture out of the groove.
- Panel several walls at the same time. When paneling several walls horizontally, work on all the walls at once, one row at a time. This lines up the panels precisely at the corners.
- Make sure the tongues and grooves are fully engaged before fastening.
- Check the cover width. Measure at regular intervals to make sure the cover width of the panels stays as planned.
- Treat the cut ends with the same product as the rest of the panel.
Fastening
You can fasten the panels with nails or staples. The fastening method depends on the panel profile and whether you want the fasteners to be hidden.
- Face fastening: We recommend fastening the panels straight through the face of the panel. This is the easiest and most reliable method.
- Panels with a hidden-nail profile: Fasten the panels through the groove. This keeps the fasteners hidden.
- Hidden fastening on other panels: You can also fasten the panels through the tongue so that the fastener is hidden. With horizontal paneling, however, this is difficult. You have to start from the bottom, and the top panel must be ripped to the right width and fastened through the face, so its fasteners remain visible.
Use stainless steel fasteners. In saunas and other humid spaces, and with thermally modified wood, the fasteners must be stainless steel.
Fasten thermally modified panels with a nailer. Avoid nailing by hand, so the hammer doesn't leave marks and the panel doesn't crack.
Protect the panel surface when nailing. Use a protective tip on your nailer so that the fastening points are free of dents and marks.
If you're unsure about any step, ask a professional installer for help.
Treat the panels before use
If the panels are not factory-treated, treat them before using the sauna for the first time.
- Spruce, aspen and alder: sauna protection treatment or paraffin oil
- Thermally modified wood species: paraffin oil
Care
- Clean the panels with tools and mild detergents designed for sauna cleaning. Strong detergents can damage the surface.
- Dry the sauna after every use. Leave the heater on for about another half hour with the door closed and the ventilation vent open.
Retreatment
Retreating sauna panels requires care. Each new treatment adds to the film on the surface, and a film that is too thick can't withstand the high temperatures of a sauna.
- Clean the surface of dirt and dust.
- Sand off a generous amount of the old treatment so that the film thickness stays moderate.
- Remove the sanding dust thoroughly before applying the new treatment.
Installing interior panels
Wooden panels bring warmth and atmosphere to your home. They're suitable for dry indoor spaces, such as living rooms, bedrooms and hallways, and are most often used on ceilings.
The color of the wood changes over time due to light and changes in humidity. Dark thermally modified wood becomes lighter, and light wood becomes darker.
Storage and acclimatization
- Let the panels acclimatize. Bring the panels into the room where they will be installed 1–2 weeks before installation.
- Store the panels correctly. Store the panels horizontally in their unopened small packs, at least 30 mm off the ground.
- Keep conditions stable. During storage, the humidity must not rise above the normal level for the room where the panels will be used, and the temperature must be higher than outdoors.
Good to know: Wet work, such as leveling and tiling, raises the humidity in a room significantly. Panels stored in the same room will swell. A construction heater, on the other hand, dries the air and makes the wood shrink, and a rapid drop in humidity can cause the wood to crack. If the packs have been stored in a tight bundle, the packs in the middle and on the outside of the bundle may have different moisture levels. That's why it's a good idea to break up the bundle and let the small packs acclimatize unopened.
Before installation
- Allow for waste. Order about 10% more panels than the calculated quantity.
- Allow extra length for cutting. The stated product length is not an exact measurement, so choose panels that are at least 5 cm longer than you need.
- Plan the direction and joints. Decide in advance which way the panels will run and where any joints will go.
- Sort the panels. Sort the panels by color or knots so that you can spread them evenly across the whole surface.
Battens
The panels are installed on battens, which always run across the panels.
- Ceiling: Install the battens at right angles to the direction of the panels.
- Horizontal paneling on walls: Install the battens vertically.
- Vertical paneling on walls: Install the battens horizontally.
Make sure the battens are straight. On a ceiling, even small irregularities are easy to see, so check that the battens are straight with care, for example with a line laser or a long straightedge. Choose the batten spacing to suit the project, but no more than 600 mm.
Paneling a ceiling
- Choose the direction according to the light. When the panels run away from the window wall, in the direction of the light, joints and small irregularities are less visible.
- Plan lighting and electrical work in advance. Mark the positions of light fixtures and wiring before paneling so that they end up in the right places and not where the battens are. Electrical work must only be done by a qualified electrician.
- Start on a straight line. Check the line of the first panel carefully, as it determines how straight the whole ceiling will be.
- Work in pairs. Long panels are easier to install on a ceiling when one person holds them up and the other fastens them. You can also use a ceiling prop.
Install the panels
- Leave room for movement. Wood moves with changes in humidity, so leave a gap of about 10 mm between the panel and the wall. The gap will be hidden behind the ceiling molding or baseboard.
- Panel several walls at the same time. When paneling several walls horizontally, work on all the walls at once, one row at a time. This lines up the panels precisely at the corners.
- Make sure the tongues and grooves are fully engaged before fastening.
- Check the cover width. Measure at regular intervals to make sure the cover width of the panels stays as planned.
Fastening
You can fasten the panels with nails or staples. The fastening method depends on the panel profile and whether you want the fasteners to be hidden.
- Face fastening: We recommend fastening the panels straight through the face of the panel. This is the easiest and most reliable method.
- Panels with a hidden-nail profile: Fasten the panels through the groove. This keeps the fasteners hidden.
- Hidden fastening on other panels: You can also fasten the panels through the tongue so that the fastener is hidden. In this case, the last panel must be ripped to the right width and fastened through the face, so its fasteners remain visible. On walls with horizontal paneling, you have to start from the bottom.
Thermally modified panels: Use stainless steel fasteners and fasten the panels with a nailer. Avoid nailing by hand, so the hammer doesn't leave marks and the panel doesn't crack.
Protect the panel surface when nailing. Use a protective tip on your nailer so that the fastening points are free of dents and marks.
If you're unsure about any step, ask a professional installer for help.
Surface treatment and care
- If the panels are not factory-treated, treat them with a product designed for indoor use. The treatment finishes the surface and protects the wood.
- Remove dust with a soft brush or a dry cloth. Clean dirty spots with a damp cloth and a mild detergent.
Caring for sauna panels
Well-maintained panels keep your sauna beautiful and fresh for years. When you dry the sauna after every use and clean the surfaces regularly, the wood stays protected from moisture and dirt.
Care during use
- Heat the sauna properly before use. A well-heated sauna dries faster and lasts longer.
- Throw water only on the heater stones. Avoid wetting the walls and ceiling.
After using the sauna
- Dry the sauna. Leave an electric heater on for at least 30 minutes after use so that the wooden structures dry out. If you have a wood-burning heater, add a few more logs as you leave. Keep the door and window closed, the exhaust vent open and the mechanical ventilation on, so that moisture leaves through the ventilation system.
- Don't dry textiles in the sauna. Towels and laundry left in the sauna add moisture and are a fire risk. Never dry laundry on top of the sauna heater.
Regular cleaning
Vacuum the panels regularly. Removing dust keeps the surfaces neat and makes thorough cleaning easier.
Wash the panels 1–4 times a year, depending on how often you use the sauna. Wooden surfaces don't like too much water, so don't rinse the walls after every use.
- Warm the sauna slightly before washing. A little heat loosens dirt and speeds up drying. Don't wash a hot sauna, however, or the detergent will dry on the surface.
- Use a sauna detergent. Choose a mild detergent designed for wooden sauna surfaces. Avoid chlorine-based and disinfecting products. Chlorine evaporates even at low temperatures and is harmful to health, and strong products can bleach and damage the wood surface.
- Wash with a soft brush along the grain of the wood. A hard brush raises the grain and leaves the surface rough.
- Rinse thoroughly with clean water. Never use a pressure washer.
- Let the sauna dry properly. Make sure there is good ventilation, but avoid drying the wood too quickly so that it doesn't crack.
Maintaining the surface treatment
The maintenance interval for the surface treatment depends on the product, where it's installed and how often you use the sauna. Renew the treatment as needed, preferably once a year. Maintain the surface in good time, so that the wood isn't damaged when its protective treatment wears off.
- Spruce, aspen and alder: sauna protection treatment or paraffin oil
- Thermally modified wood species: paraffin oil
Before treatment: Wash the panels and let them dry properly. Protect the floor, for example with plastic sheeting, as treatment products soak easily into tile joints.
Retreatment with sauna protection treatment
Retreating panels that have been treated with sauna protection treatment requires care. Each new treatment adds to the film on the surface, and a film that is too thick can't withstand the high temperatures of a sauna.
- Clean the surface of dirt and dust.
- Sand off a generous amount of the old treatment so that the film thickness stays moderate.
- Remove the sanding dust thoroughly before applying the new treatment.
- Apply one thin coat. One coat is usually enough for sauna panel surfaces.
Always follow the treatment product manufacturer's instructions.
Also remember
- Follow the sauna heater manufacturer's instructions and never exceed the maximum permitted temperature. Excessive heat can warp the wood and cause a fire hazard.
- Wooden surfaces darken naturally over time, fastest near the heater and in the areas hit by hot steam.
- Thermally modified wood may give off its characteristic scent when the sauna is heated. The scent fades over time.
Caring for interior panels
Proper cleaning keeps surfaces in good condition and looking beautiful.
- Remove dust regularly with a soft brush, a vacuum cleaner or a dry cloth.
- Wipe dirty spots with a damp cloth and a neutral detergent. Avoid using a lot of water or strong detergents.
- Maintain the surface in good time. The maintenance interval for the surface treatment depends on the product and where it's installed. When the surface starts to wear, maintain it so that the wood isn't damaged when its protective treatment wears off.
Maintenance treatment
- Wash the surface with a paint cleaner.
- If needed, sand the surface lightly to a matt finish and remove the sanding dust.
- Treat the surface again. One new coat is usually enough.
Changing the color
Changing the color of your panels is more demanding than a regular maintenance treatment. The new color needs to cover the old one evenly and adhere well to the previous surface.
- Wash the surface thoroughly with a paint cleaner and let it dry.
- Sand the surface to a matt finish and remove the sanding dust. Sanding improves the adhesion of the new treatment, especially on varnished and glossy surfaces.
- Prime if needed. A primer evens out color differences and prevents knots and dark spots from bleeding through, especially when you change from a dark color to a light one.
- Be prepared to apply several coats. The bigger the difference between the old and new color, the more coats you'll need.
Consider the previous treatment:
- Oiled or waxed surface: Paint may not adhere to an oiled or waxed surface. Do a test patch on a small area first.
- From opaque to semi-transparent: A semi-transparent treatment doesn't cover old paint, so the old paint layer would have to be removed completely. In practice, this is laborious, and choosing a new opaque color is often the easier option.
- Darkened or yellowed surface: The surface looks fresh again when you paint it a light color. A heavily darkened surface needs a primer and several coats.
For many Finns, the home sauna is a favorite place, but it demands a lot from interior materials. Temperatures can rise above 100°C, and the high humidity means that ceiling and wall panels, for example, are under heavy stress.
Lauta.fi’s versatile Tuuli Sauna product family is designed to withstand the sauna’s changing and challenging conditions. With Tuuli Sauna products, a sauna can be decorated in a stylish, timeless, or modern way—either in harmony with the rest of the home or as a distinct and unique space. They allow the home’s interior theme to continue into the sauna, or for the sauna to stand out as a completely different environment.
The range includes ceiling and wall panels, bench boards, bench facings, and bench frame posts—all of which greatly influence sauna atmosphere. It also offers finishing products such as cover, edge, shadow, corner, and ceiling mouldings, as well as boards and slats. This diverse and adaptable product family brings both ambience and durability to the sauna, enabling practical and safe solutions for tricky design spots.
While Tuuli Sauna is optimized for sauna conditions, its products are also suitable for other interior uses. Its panels, boards, and slats can be used in single-family homes, apartments, and other living spaces, making it possible to create a completely unified interior style throughout the home. Tuuli Sauna products are also used in offices, customer spaces, and public buildings. Design options are further expanded by their compatibility with the Tuuli Indoor product range for general interiors, which matches perfectly in style—though Tuuli Indoor products are not suitable for sauna use due to heat and humidity.
The extensive Tuuli Sauna range features many wood species, including giant thuja, thermo radiata pine, thermo alder, black alder, thermo aspen, aspen, thermo pine, and spruce. The natural individuality of wood—such as varying knot patterns—makes each product unique.
While interiors often feature materials like plastic, concrete, glass, or metal, Lauta.fi’s Tuuli Sauna products are natural and eco-friendly wood. They are engineered for strength and usability on par with other materials, while tolerating sauna heat and moisture exceptionally well.
Lauta.fi delivers product sample pieces to both consumer customers and professionals, such as architects, interior architects and designers, construction industry and procurement professionals.
If you are interested in ordering one or more sample pieces, please contact our sales department via email lauta@lauta.fi or phone +358 3 3123 6000 (On weekdays 8-16).